Sunday, December 30, 2012

Christmas Gift!

My wonderful wife got me a great Christmas gift this year for the system. She surprised me with a ThermoWorks Thermapen.


I had been speaking about how best I could calibrate the probes and thermometers on my system, and mentioned I needed a good tool to help with this. There are several ways I have read that people calibrate their thermometers. The most straight forward is an ice water test to dial in 32 degrees. The other is a boil test. Water boils at 212 degrees, but will vary slightly based on altitude which should be factored in. However most of the brewing temps I am trying to monitor is around 150-170 degrees, so when possible it is best to calibrate directly within that range.

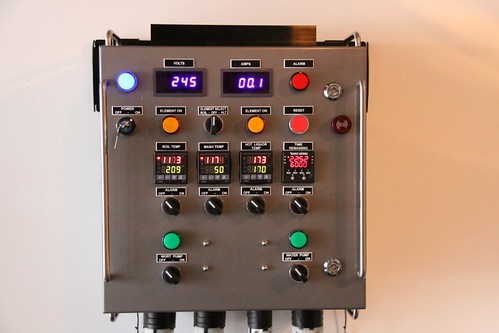
My new Thermopen comes certified Pre-calibrated to within +/- 0.7 degrees F. I spent a bit of time yesterday taking off the temp probe from my Mash Tun, and my HLT. I warmed up some water to around 155 degrees, then used the Thermopen along with the probes to dial-in the PID calibration. It probably only took me 10 minutes to get both PID's calibrated. As I watched the temperature of the water cooling in the cup I was using, you could see the temps drop at the exact same time for both probes. That was a great sight to see!

What I did previously was to take an average of all the thermometers and probes that came to me. They all state they have been calibrated before shipping, but the reality is there was easily a 5 degree difference between the largest extremes of what came out of the box. It turns out I was pretty close, only around 1 degrees off.

Now that my system is dialed in, I plan to brew tomorrow an interesting Chocolate Mint Stout. Also the revisited Holiday Ale is really finding its stride right now and is ready to drink. The tweaks did what we hoped between the first batch and the second batch. We will be submitting this for a competition being held by Middle Brow here in Chicago. This would be our first competition submission. We have no expectations of winning, but it will be great feedback.

More to come tomorrow after the brew day!


Sunday, December 9, 2012

Batch #8 - Holiday Prowler Ale Revisited

After making Batch #6, we felt though a good beer, it didn't hit the flavor profile we were looking for.  The very successful Holiday Prowler Ale from last year was an extract based recipe, so we needed to make an all-grain version of this.  Our tasting notes of Batch #6 are that it is a little too dark, there is too much Chocolate Malt on the front end, and the spices (we think later identified as Allspice) we too much.  With that said we wanted to reduce the Chocolate Malt, and the spices.

In working Batch #6's amounts, I allowed my software to increase the amounts based on a 12 gallon brew.  In reality we try to end up with 12 gallons at the end of the boil, but are ultimately only trying to make 10 gallons.  You will lose some in the transfer as you can't get it all, and the beer will shrink a bit when it goes from 210 degrees to 65 degrees.  Later you will lose a bit more when you transfer to secondary because yeast and proteins settle down to the bottom which is about .5" thick.  With all that said the software took what should have been 5 units for a 5 gallon batch, and made it 12 units.  This really added 20% more spices/etc.  than was probably needed.  We dialed it down to be based on 10 gallons this go around.

Lastly we think we also made three mistakes during the first batch we made.  I think we forgot to take out the chlorine of our water.  We also forgot to use Molasses as the recipe calls for, in my converting I forgot to include that ingredient.  In addition we think we pitched all the spices at the start of the brew last time, and not just the last 15 minutes.  We don't remember that last part for sure, but we do remember smelling the wonderful smell of spices for a long time that day.

Here is the revised recipe:

20 lbs - US 2-Row
2 lbs - Crystal Malt 80L
1.5 lbs - Crystal Malt 20L
.5 lbs - Chocolate Malt
3 lbs - Clove Honey
4 oz - Molasses

Additives - To be added in last 15 minutes of boil
8 - Cinnamon Sticks
1 tsp - Nutmeg
2 - Vanilla Beans split lengthwise
3 tsp - Cloves (whole, not ground)
14 each - Allspice (whole, not ground)
4 each - Zest of Orange
2.5 tsp - Irish Moss

Hops
2 oz - Cluster - 45 Min
2 oz - Willamette - 15 Min

We mashed for 60 minutes with 30 qt of water at 152 degrees.  After 60 min we brought up to 170 degrees to mash out and sparge.  In total we brought over 14.5 gallons of wort for then a 60 minute boil.  You start for 15 minutes with nothing but the sugars in adding the Honey and Molasses.  We then add the Cluster hops 15 minutes in, then 45 minutes in we add the spices and remaining hops.

The color was looking much better this time, closer to last year.  I think we also really identified the proper differences from the last batch and corrected for this batch.  I think it will end up being much smoother as we are going for, and delicious!

Here are the specs:

IBU's - 24.86
Color - 17.3 SRM
Calories - 215 per 12 oz
Estimated OG - 1.066
Actual OG - 1.069
Estimated FG - 1.016
Estimated ABV - 6.55%
New Estimated ABV from Actual OG - 6.94%

We do our calculation based on an 83% efficiency of our system.  The software is telling us we hit 88% efficiency.  I suspect the higher rating, which also resulted in a higher OG, due to the honey and molasses and how the software is calculating.  It is always possible we are getting more efficient, but I suspect not that much.

Because of all the flavors in this batch, it does well to sit and age for a while.  We still have a few more weeks to X-Mas, so our current batch that is drinkable now should only get better.  This batch won't be ready to drink at its soonest 12/29, but will be at its best a few weeks after that.

Batch #7 - Whiskey Oak Aged Ale

We are big fans over here of Kentucky Bourbon Barrel Ale.  Most bourbon barrel beers I have tried are generally based on Stouts.  I enjoy a good Stout, but I tend to enjoy Ale's more.  This beer is a smooth beer that is well balanced.  We decided to try to make a similar beer here.

Researching the internet, it was hard to find a solid recipe for this.  There is much debate out there on several aspects of a beer like this.  Most people feel that the recipe is probably based on the brewery's Kentucky Ale recipe, which is a blend of an Irish Red ale and English Pale Ale.  However there are not many Pale Ale characteristics (I feel) in the KBBA, so I decided to go with a straight Irish Red Ale recipe to use as the base.

Here is the recipe we used:

20 lbs  - US 2-Row
2.16 lbs - Crystal Malt 40L
2.16 lbs - Briess Carapils
1.62 lbs - White Wheat Malt

Mash was a 90 minute mash at 150 degrees with 33.75 quarts of water.  We mashed out at 170 degrees and Sparged for 60 minutes.

Hops
24 g - Goldings, East Kent - 90 minutes
24 g - Fuggles - 45 Min
12 g - Fuggles - 15 Min
2 each - Whirfloc Tablets 15 Min

Boil was for 90 minutes.

Yeast
Wyeast 1098 - British Ale

Fermentation at 64 degrees

The second discussion is how to best oak.  Some people use oak chips, some oak cubes, some oak spirals, some oak barrels, some oak for a couple of weeks, some oak for months, some pour whiskey directly into the beer.  As you can see no one has a concrete formula, there is trial and error here.  With that we were going to split our batch into two batches and try to methods.  The first method was going to be a used 5-Gallon oak whiskey barrel.  The second method was going to be soaking an American Oak, medium char spiral in whiskey for 4+ weeks.  For the oak spiral I used Single Barrel Jack Daniels.  No particular amount, just enough to soak the entire oak spiral.

Unfortunately the place I had identified to get used whiskey barrels ended up selling out.  I did not act fast enough!  I decided when I transferred to secondary to transfer both batches, but only put the oak spiral in one of the batches and sit tight on the other hoping the place would get more oak barrels.  After waiting about 2 weeks though, no more oak barrels have showed up so I went ahead and got a second oak spiral soaking in whiskey now.

Tasting of this brew at the time of transfer was great.  It is a very smooth beer on its own.  I might have to make this as a simple ale later on.  We then did a tasting a week later of the batch that had the whiskey soaked oak spiral, and I can tell this is going to be good.  It isn't on the money in taste right now with the Kentucky Bourbon Barrel Ale, but it is tasting real good as its own.  We are going to sample the beer weekly to determine when to pull off the oak.  As mentioned above there is great debate on how long the oak should stay in.  People indicate it is easy to go overboard.  It has everything to do with volume and oak surface area, so it will vary.

More to come later with more tastings!

Here are the key metrics on this batch:

IBU's - 14.54
Color - 8.6 SRM
Calories - 245 per 12 oz (ouch!)
OG - 1.075
Anticipated FG - 1.019
Actual FG - 1.020
Anticipated ABV - 7.34% (the whiskey may increase that part)
Actual ABV - 7.21% (not factoring in whiskey)

We hit our efficiency of 83% on the nose for this batch.

Tuesday, October 23, 2012

Batch #6 - Holiday Prowler Ale

Sunday we brewed our 6th batch, and man did it smell awesome!  It definitely felt like fall in the air with the smells of cinnamon, nutmeg, allspice, and oranges.  We had a great audience this week during our brew day, most every neighbor stopped by for a sample!  On tap was some of Batch #2, I think we went through at least half of that keg.

Brewing went mostly smooth, learned a new lesson at the start.  We were having issues getting the wort pump primed, and we determined it had to do with the lack of gravity pressure on the line.  The way we corrected was to throw more water into the mash tun (pre-mash) so there was more pressure on the output.  Once the water started flowing properly through the HERMS, we put the excess water not needed for the mash back into the HLT for later use.  Worked like a charm!

This holiday ale recipe was first brewed by us last year as an extract brew.  We rushed the brew window a bit because we wanted it ready for Christmas.  It ended up tasting so good, we brewed another batch a couple of weeks later.  This is our first attempt at converting an extract recipe to an all-grain.  We are brewing it a bit early in case we want to make any tweaks so we have time to make it again.  I think it will end up turning out great though.  Even with that said, we sampled a little of this brew before pitching the yeast, and I think we are going to want to make another simply because we are going to blow right through the first batch!

Here was the recipe:

20 lbs - US 2-Row
3.6 lbs - Clover Honey
3.5 lbs - Crystal Malt 20L
1 lb - Chocolate Malt

Mash was for 60 minutes at 154 degrees.  Boil for 60 minutes.  Here were the hops:

64.5 g - Cluster for last 45 min
64.5 g - Willamette for last 15 min

Here were the spices:

9 - Cinnamon Sticks
1.2 tsp - Nutmeg
2.5 - Vanilla Beans (split, scraped, then chopped)
3.6 tsp - Ground Cloves
17 - Allspice
5 - Zest of Oranges

Lastly we added 2 wirfloc tablets for clarification.  For our yeast we pitched two different yeasts, one in each 5-gallon carboy.

White Labs WLP0013 - London Ale Yeast
WYEAST 1968 - London ESB Ale

I went with the London ESB Ale yeast because the store was out of my London Ale Yeast I needed.  The guy who worked there said he strongly recommended this yeast for holiday ales, so I'm giving it a try.  We later realized they had the London Ale Yeast in their White Labs stock which is why I have that too.

The attenuation of the London ESB Ale yeast is a bit lower, so this means the beer may not have as high of an ABV (alcohol level) as the carboy that has the London Ale yeast.  This is so because attenuation of the London Ale yeast is higher.  We'll see though.  We started with a very high OG of 1.073.  It has the potential to be around 7.34% ABV.

Here are some other stats for this beer:

IBU's - 28.20
Color - 18.3 SRM
Calories - 222 (going to be filling!)
OG - 1.073
Anticipated FG - 1.017
Anticipated ABV - 7.34%

We actually also hit 90% efficiency as well on this batch.  I suspect we were so high because we were using honey which is pure sugar basically.  Normally we are around 83-85% efficiency right now.

Lastly, we are going to ferment at 68 degrees over 5-7 days.  We will then transfer to secondary for clarifying for another 7 days.  The last three days of secondary we will cold crash down to 36 degrees for further clarification.

That's it for now!

Saturday, October 13, 2012

Between Brews Update

I've been working through quite the wave of travel, which has delayed some brews.  If all goes well tomorrow though I might start the Holiday Ale now.  I am thinking it will be good to give it a test run before the holidays so I can brew another batch if needed.

Even though we didn't brew lately, I have some updates on the last brew.  I don't think our Banana Ale is going to turn out with much banana (again).  This may end up being NSBA2 (Not So Banana Ale 2).  I allowed this to sit in primary fermentation for two weeks at 72 degrees.  This temp should be high enough to produce the banana esters.  In addition I did not pitch the entire pack of yeast into these batches, which should have helped with the under pitching.  I'm left scratching my head a little.

This is our third attempt at brewing a banana ale.  Our first attempt had banana flavors, though they were more subtle than I wanted.  We did this at 72 degrees, but it was a higher gravity brew.  It had a lot of honey in the recipe which helped make it higher gravity, but it was a bit too heavy of a beer.  The banana flavor was very strong in this beer when we transferred from primary to secondary.  However at kegging it almost went completely away, but with a little aging it came back stronger after a few weeks.

The next batch we did as a simpler ale recipe without the honey.  The gravity was much lower, and I ended up fermenting at 76 degrees in an attempt to get more banana flavor.  However the end result had no banana flavor at all.

This batch I tried to get the best of all worlds.  I used a wheat ale recipe which had a higher gravity (not as high as the first, but not far off), and fermented again at 72 degrees.  As mentioned above I also tried to under pitch by not using all the yeast.  I thought for sure this would work!

My results so far are after 2 weeks in primary I transferred to secondary.  I did not keg yet as all my kegs are full.  I put the secondaries into the fermentation chamber and cold crashed it to help clear the beer.  That is where it is right now, been there almost a week.  When smelling and tasting after transferring I got no scent or flavor of banana, however I might have picked up a hint of clove.  This is odd because this yeast does produce clove flavors if fermented at cooler temps.  My only hope is that banana flavor will surface after a few weeks of conditioning.  If this doesn't work I'm going to go to another strand of yeast to try.  There are a few that produce banana flavor, this just happens to be the most flocculant which results in a clearer beer.

I am also slowly carbonating several of the kegs and will post tasting notes shortly on those.  Right now I'm sampling from batch#4 which is almost done carbonating.  I also have one of batch#2 kegs carbonated now.  I have also started carbonating the Saison we brewed over the summer, which is our last extract batch I have on hand.  It tasted a little rough at kegging, so I let it condition for a couple of months.

Tasting notes to come shortly, and maybe a brew day tomorrow!

Sunday, September 23, 2012

Batch #5 - Banana Wheat Ale

I am going after that always tricky banana flavor again today with our Banana Wheat Ale.  This time we are using the Lagunitas Little Sumpin Sumpin recipe as the base Wheat Ale recipe, however we are using a different yeast, and will not dry hop the batch.  Below is today's recipe:


3.68kg US 2-row 50%
2.77kg wheat malt 37.6%
90g home toasted wheat malt 1.2%
830g torrified wheat 11.2%

Boil for 90min

11g Nugget 9%AA at 90min
2g Horizon 12%AA at 90min
2g Summit 17.5%AA at 90min
8g Willamete 5.2%AA at 45min
27g Santiam 5.6%AA at 15min
9g Willamete at 15min

WYeast 3333

Mash at 150F for 45 minutes
Ph at 5.5

Pitch at 72F for 7 days
Rack at 72F for 4 days
Cold Crash at 36F for 3 days
Keg and Carbonate

The brew day today went very smooth except for one part, trying to set the ph for the sparge.  For some reason I keep overshooting the level with lactic acid.  I will add 1ml and let the water circulate in the HLT for 10 min and take a reading, it was showing 6.6.  I added 1ml more, let it circulate, took another reading, 6.4.  I added 1ml more, did the same circulation for 10 min, took another reading and it was showing 4.8!  No idea why the big jump, or if it was correct.  I need to read more on my ph meter and see if there is something I'm doing wrong.

Other than that part, everything else went great.  I have the beer fermenting right now, can't wait to see it tomorrow doing its magic!

Today I also took a moment to do a quick video of the brew day to show how the mash process works on this brew system.  Enjoy!


Monday, September 17, 2012

Tasting Notes - Batch #1

Batch #1 - Dogfish Head 60 Minute IPA Clone
Style - IPA

Targets 
OG - 1.077
FG - 1.025
ABV - 6.81%
Efficiency - 92%

Actuals
OG - 1.071
FG - 1.011
ABV - 7.86%
Efficiency - 85%

Misc
IBU's - 47.89
Color - 1.069

Appearance
The appearance of this beer matches the Dogfish Head very closely, however there is a slight bit more chill haze in our brew.  It is an inviting color, pours with a nice head.

 Smell
The hops are present, but a little more subtle than Dogfish Head.  They have a light floral aroma, and notes of citrus.  Though it doesn't match the Dogfish Head, it is a pleasant smell.

Taste
This beer is not very bitter, low IBU's.  The biggest different between ours and Dogfish Head is that ours is missing any Chocolate Malt flavors.  There is a hint of it in Dogfish Head, and none used in ours with no taste of Chocolate Malt.  It is very slightly sweet up front with a smooth finish.  Many of my neighbors who are not craft brew drinkers really liked it, which tells me it wasn't too strong in any direction.  Some people felt they could taste Grapefruit.  I suspect so because of the sweetness up front, and the slight bitter taste for a finish.

Mouthfeel
This is a great beer to drink, not too heavy and not too light.  It doesn't coat your mouth.

Overall
Though I think this a fail in trying to create a Dogfish Head clone, it is a good beer on its own.  Probably not hoppy enough to actually be called an IPA, probably more a simple Pale Ale.  We used two different yeasts on this batch, Wyeast 1056 (American Ale) and White Labs 0041 (Pacific Ale).  I felt the American Ale yeast was a little less dry and slightly sweater, or with more hints of fruit.  The Pacific Ale also had fruit notes, but they were more subtle.  Both yeasts cleared out almost the same.  I would make this brew again as people really liked it, however as this was our first brew, some of what we did will not be re-creatable.  If you read our notes from that brew day you will see the challenges we had that we worked to overcome.

We just kegged Batch #2, and hopefully will be able to taste next week.  We'll see if we improved!

Sunday, September 16, 2012

Weekend of Bottling and Kegging

This is the first weekend we took off from brewing. However there was no shortage of work to complete! We had four carboys ready for kegging today. That is a lot of cleaning, sanitizing, etc... I actually had to purchase two more kegs on Friday so I would have enough kegs.

I am getting ahead of myself though. First let me say that Batch #1 was finally ready to drink this weekend. The weather here was perfect, so Friday after work I opened the garage door, and the beer was flowing. Most of my neighbors stopped by for a sample, or two, or three. We were out there until around 11pm, it was great. Feedback was very positive!

Saturday I needed to free up some kegs, and clean out the two new ones I bought on Friday. I bottled the last of the British Brown Ale, which only had about 4 bottles left in it. Then I bottled the last of keg 1 from Batch #1. To my surprise we only had about 10 beers left! We really went through a lot!

Today was all about cleaning the kegs, kegging, and transferring Batch #4 to secondary. The tasting notes from the batches we kegged today are as follows:

  • Batch #2 - This batch was split and fermented with two different yeasts, an American Ale yeast and American Ale II yeast. Visually the American Ale yeast looked great, it had really cleared out. The American Ale II yeast though was still cloudy. Tasting of the two was ok, but there was an odd finish to both. Am hoping that is going to settle out as it conditions.
  • Batch #3 - This beer really changed its flavor from last week when we transferred. It has lost a bit of its sweetness, and gained some good hops from dry hopping. We did not split this batch so both 5-gallon carboys have the same ingredients.
  • Batch #4 - We transferred this into secondary today. Tastes a bit sweet like Batch #3 did at this stage. Am doing a little something different for dry hopping this time, am going to us a mesh bag to hold the hops so hopefully they fully submerge into the carboy.
Cleaning Kegs


Transfer of Batch #2 to Kegs
Next weekend we will be brewing our Banana Ale. Already looking forward to the next brew day! We will also have two more kegs to do. The beer is backing up!


Sunday, September 9, 2012

Batch #4 - Lagunitas Little Sumpin Sumpin Clone

Today was a "take 2" of the Lagunitas Little Sumpin Sumpin. Last week when we brewed we suffered a bit of a stuck mash. Our HERMS system takes the liquid from under the false bottom in the Mash Lauter Tun (MLT), circulates it through the Hot Liquor Tank (HLT) to heat up, then is deposited back on top of the grain bed in the MLT. Last week's issue ended up being that the grain bed was too dense, this was due to a couple of factors.

First, wheat is a heavy ingredient in this brew. As such wheat is more dense than barley. When you crush a barley you get the husk as well as its insides. Wheat does not have a husk. A trick you can do is to add rice hulls to your mash to create that airspace needed so the grain bed doesn't get so dense.

Second, I crush the grain a bit finer than other people with this similar brew setup. After learning this I set the crusher to a larger gap (.045 inch).

With these two adjustments made, today's brew went much smoother. The mash was spot on temperature, I was able to mash out by raising the temperature up to 169, then I sparged for 1 hour. Everything went as planned.

Yesterday I prepped everything ahead of time for today's brew so I wouldn't have to worry about measuring anything, cleaning, transferring, etc... That work paid off today as I was able to relax during much of the brew session. The only item I needed to do today was to transfer last week's brew to secondary and dry hop. Outside of that it was all brewing! (lots of cleaning as you go too)

I also spent today cleaning up the freezer fermentation chamber. I made two mistakes in setting this up last week. First I did not check to ensure the defrost plug was completely secure. I ended up having puddles all week that needed cleaning. The other item is I did not setup my blow-off tubes correctly and some overflowed into the freezer bottom. After I transferred the batch in there today I cleaned up the freezer and secured everything for today so as not to repeat this week with another mess.

All-in-all I am very happy with the rhythm of today's brew day. There was not any lost time anywhere, everything flowed around well (with no spills), and cleanup was better and easier today as well. Brew days are long, and getting more efficient not only produces better brews, but saves time.

Right now it takes me around 9 hours on brew day! Some key time factors:

  • 30-45 minutes to bring 20 gallons of water in the HLT up to 155 degrees
  • 30 minutes to transfer water to MLT and bring temp back up
  • 30 minutes putting in grains, stirring, and setting ph level
  • 45 min mash
  • 20 min mash out
  • 60 min sparge
  • 20-30 min to bring up to boil
  • 90 min boil
  • 45 min chill and transfer to fermenters
  • The rest of the time is cleaning...lots of cleaning!
No idea what the above actually calculates to, and some recipes have different mash times, and boil times, but that is the bulk of it time after time.

I should also mention I got to taste Batch #1 as I Kegged it yesterday. Tastes really good for our first batch. The original Dogfish Head 60 min IPA I believe has some chocolate malt in it (I need to investigate that). Our recipe did not, so you don't that that subtle flavor, which is ok by me. I do believe the dry hopping could have been better though, as I don't think I got the full effect. Issue was many of the hops simply laid on the surface of the wort. I think there are tricks you can employ to ensure the hops remain submerged.

Today I also got to taste last week's Batch #3. I think this tasted great! Really looking forward to how this weeks improvements improve the taste between the two batches.

Next week we will be kegging batches #2 & #3, and brewing a new batch of Banana Ale. Until then!


Monday, September 3, 2012

Batch #3 - Little Sumpin Sumpin Clone

On Saturday 9/2/12 we brewed our 3rd batch.  A clone of Lagunitas Little Sumpin Sumpin.  A beer I've only recently tried, but really enjoyed.  It is an American Wheat Ale with a bit of hops.  While shopping recently at Brew and Grow I mentioned to one of the guys who work there who brew that I wanted to do this recipe, and he turned me onto the Jamil Show on the Brewers Network where this was podcasted:

http://thebrewingnetwork.com/shows/705

This episode is an interview with the brewers at Lagunitas where they share their recipe for Little Sumpin Sumpin.  We needed to reduce the recipe to our size brew, and I figured someone online already did this, so I found the following which matched my quick calculations (found here):


3.68kg US 2-row 50%
2.77kg wheat malt 37.6%
90g home toasted wheat malt 1.2%
830g torrified wheat 11.2%

Boil for 90min

11g Nugget 9%AA at 90min
2g Horizon 12%AA at 90min
2g Summit 17.5%AA at 90min
8g Willamete 5.2%AA at 45min
27g Santiam 5.6%AA at 15min
9g Willamete at 15min

24g Cascade dry hop
24g Centennial dry hop
24g Simcoe dry hop
24g Chinook dry hop
18g Amarillo dry hop
15g Columbus dry hop

WLP002

Mash at 150F

Pitch at 62F, raise to 68 after 36', then raise to 70F after another 36'.


We actually had to do some small variations on this recipe as our hops were not at the same Alpha levels, but using a simple online calculator we could convert to the proper amounts for our needs.  After plugging this into our beer recipe tool it showed that it would be lower in IBU's than the original, but I was ok with that as I wanted more of a hint of hops.  We'll see how this turns out and will increase next time if needed.

Our brew day went ok except for our mash phase.  For some reason we were not getting good flow through our HERMS system between the MLT and HLT, and temps were slow to adjust.  We think the liquids were just struggling too much getting through the grain bed.  This might have been the case because this recipe calls for lots of wheat instead of our usual grans.  What this taught us is going forward I am going to bring up the strike water about 4 degrees above our mash temp before mashing.  This way we start mashing at temp once grains are introduced and we don't have to mess with bringing up the temp, rather just maintaining it.

The rest of the brew day was usual hanging around, drinking home brews, and lots and lots of cleaning!  We did get to transfer our Batch 1 (Dogfish Head 60 Min IPA Clone) to secondary and start dry hopping.  We got to taste it, and wow there is a big difference.  We really have taken our beers up a significant notch here!  We can't wait to try this now.

I did make a mistake in dry hopping the IPA though, I forgot to split the hops between the two carboys, instead I dumps x2 the hops into the first carboy.  So that one will be our Double IPA!  Fortunately I had enough hops on hand in my inventory to do the second carboy properly.  We will be kegging it next weekend.

We also added a new piece of equipment to our gear.  We picked up a reach in freezer which we have controlled by a Johnson Control Thermostat Controller.  We are using this to ferment our beers so we can control temps to within 1 degree.  I have read a lot about how fermentation temperature control is simply crucial, otherwise you are often taking a shot in the dark.  Yeast simply tastes differently at different temps, and no two yeasts are the same.  For example the Little Sumpin Sumpin clone calls for 36 hours as 65 Degrees, 36 hours at 68 degrees, then complete out at 70 degrees.  Try to do that in your basement without temp control!

Here is our upcoming schedule of beer related work:

  • Bottle Case of British Brown Ale on tap for our friends in Indy who helped us brew it
  • 9/8
    • Keg Batch 1
    • Transfer Batch 2 into secondary and dry hop
    • Take a look at Batch 3 to see progress
  • 9/15
    • Batch 1 should be ready to drink!
    • Keg Batch 2
    • Transfer Batch 3 into secondary and dry hop
    • Brew Weekend!  Time to brew Batch 4
  • 9/22
    • Batch 2 should be ready to drink!
    • Keg Batch 3 (will probably need to bottle remaining Batch 1 prior to free up the needed 2 kegs)

Sunday, September 2, 2012

Upcoming Schedule of Brews

We are trying to plan out our next several brews.  This helps us identify what ingredients we can buy in bulk, as well as work out schedules of fermenter use and ready to drink dates.  With holidays coming up in several months, you have to start planning now!  Here is what we have so far:


  • Little Sumpin Sumpin Clone - To finish off Summer right!
  • Banana Ale - The always elusive banana ale recipe we keep trying.
  • Pumpkin Ale - Yum
  • Strong Belgian Ale - Haven't determined what kind yet.
  • Holiday Ale - A nice brew we made last year for the holidays with lots of flavor.
  • Stout - Haven't determined what kind yet.
Since we are brewing about every other week, this is about 3 months of brewing.  As there is about a one month turn around time on brewing to drinking, that means the last beers won't be ready to drink for 3-4 months, which puts us right at the holidays and winter.

After we get all these brews under our belt we may start a lager which takes much longer to make.  Lagering a beer is going to be a little tricky as you have to keep at cold temps for extended periods of time.  Since we brew 10 gallons at a time, that means we have 2 carboys of beer to keep cold during this process.  Doing this in the winter time gives us a few more options as the garage will be cold all day and night.  We'll see though if that makes sense when the time comes.

Today's brew, Little Sumpin Sumpin!

Monday, August 27, 2012

Batch #2 - Dogfish Head 60 Minute IPA Clone

After some discussion, we decided to do the exact same brew again.  First off I was anxious to do another brew!  The system was calling!  The whole week I reflected on our brew from the last weekend, and realized we may have made a major mistake.

Though we were careful to sanitize everything that would come in contact with the beer, I realized we may not have sanitized the outside of the hose that comes out of the chiller into the fermentor.  Doh!

In doing the same batch again, we felt we would have one of two results:
  1. If the first batch was good and no contamination, then this second batch would demonstrate how much better the rig was performing with us tightening things down.
  2. IF the first batch ended up being bad, then we have an IPA just a week behind it and it would help reduce the sting of such a mistake.
The brew day started at 10am, and I was running solo today as Sam had to go down to Indy.  I started by filling the HLT, removing the chlorine, and bringing up the temp.  While that was going on I started crushing the grain.

First problem of the day - I thought I had 28lbs of the 2-row, turns out I had 27.  Off to the store I went!

Once I had all the grains, I completed the crush, then started moving water into the MLT.  The connections were much better today, little to no leaking.  I felt this would help with better heat exchange as well.  The performance was better than last time, however it does seem to take ages to get that last 1-2 degrees in the MLT.

Second problem of the day - The PID on the HLT was overshooting the temp setting.  There is a way to calibrate them, so next time I brew I am going to do so.

I then put in the grains, stirred, added brewers salts, took Ph readings, and brought it down to 5.2-5.3.  Set the timer for 90 minutes and there we go!

Third problem of the day - The Wort pump started making a clicking sound.  I could not hunt it down, and it persisted the entire brew.  However its intensity lessened over time.  The flow seemed ok on everything so I didn't sweat it much, more annoying right now.

After the mash I started the mash-out in bringing the temp of the MLT up.  At this same time I started to adjust the Ph of the HLT for the sparge process.

Fourth problem of the day - I ended up putting in too much lactic acid!  My Ph went down to 4.2!  My target was 5.6-5.8, so I missed that by a mile.  Eventually I removed a lot of the water, and added new tap water and removed the chlorine.  This presented a problem though with the heat exchange in the HERMS, so it slowed my mash-out quote a bit.  I was able to get proper Ph though before sparge.

I then started to sparge, and things were looking good!  Once I had the level I needed in the boil kettle we were off and running.  This recipe has a lot of adding hops, so I spent most of the boil standing near the kettle tossing in hops.

After the boil was complete I hooked up everything to chill the wort.

Fifth problem of the day - I connected everything and opened all hoses.  Then I started the cold water flow to chill, however I was getting leaks in several places.  One was due to simply not being tight enough, another the steel band wasn't tight enough around the barb, and the last was due to the rubber washer being in the wrong place.  While fixing all of those I didn't realize that my boil kettle was draining into my fermentor!  This now meant I had about 2 gallons not very chilled.

Sixth problem of the day - Once I got the chiller dialed in for good temp, the flow started to slow significantly towards the end.  Looking closely at the hose coming from the boil kettle I could see lots of air getting into the line.  This had me stumped as everything looked submerged still.  After later posting this experience on a forum, it was pointed out to me that the Hop Stopper I used will suck in air towards the end once any part of it goes above liquid line.  Because hops now line the outside of the Stopper, it slows flow down.  The solution is to slow the pumps to a crawl to keep siphon pressure in the line.

I ended up getting frustrated and left about one gallon behind that I didn't mean to, so I'm only fermenting about 9 gallons.  Our OG on this batch was 1.069.

Their ended up being one ingredient change from the first go around, unfortunately my local brew supply shop ran out of the Pacific Ale yeast by White Lab, so I substituted the Wyeast American Ale II yeast.

Since I had filled a carboy with about 2 gallons of hot wort, I had to let that cool before I could pitch the yeast.  I ended up putting that in the sink and putting the stopper in the bottom to let it set in a cool bath while the other carboy was filling up.  Afterwards I then let it sit in the colder basement for about 2 more hours before pitching the yeast before bed.

Once I had everything transferred, it was clean-up time!  That does take a long time when it is just one person.  The HLT of course is super easy to clean, as basically there is nothing to clean since it only holds water!  The MLT has almost 30lbs of grain in it, so there is a lot to clean there.  Fortunately it is the only kettle without a heating element so it is easy to bring into the sink for cleanup.  The boil kettle is a bit trickier to clean as it is the furthest from the sink, and there are a ton of spent hops in it that will clog the sink.  I've been using a strainer in the sink to separate the hops, it helps but it is still a slow process.

After the kettles are clean, the pumps and the chiller also need cleaning as well as the hoses.  I then put hot water back in the HLT, and run it through the whole system, then at the end of the line I drain it into the sink.

Whew, what a long day of brewing, but so much fun!  In the next few brews we will start adding parts to the brew day as well such as transferring from primaries to secondaries, as well as kegging.

Sunday, August 26, 2012

Tighting Down the Rig


After our first brew session we reviewed what needed to be addressed on the rig so our next would be even better.  In general there were more things dripping than we would like to have seen.  Some of which were easily addressed by tightening down fittings, others had to be completely removed and taped again with Teflon, then tightened back down.  The other drips were coming from the disconnects themselves.

We are using quick disconnects on our system.  They basically look like this:
Product Photo
Inside these disconnects are o-rings that can cause a leak if they are damaged or simply old.  I went ahead and ordered about 10 replacements o-rings to ensure no issues.  They arrived on Wednesday, so we decided to do a hot water run of the entire system to test out.  We knocked out basically every leak but one, looks like one of the male quick disconnects is problematic that will need to be replaced as well.  For now we moved that to the HLT input as only water goes through there.

This also gave us an opportunity to clean everything out with a deep clean, another process to get familiar with.  We use PBW cleaning solution to clean the kettles.  We let them set in each kettle for 30 minutes, and cycled it through our pumps and wort chiller.  Afterwards we rinsed everything completely.

Part of the reason we did this too is we saw what we felt was machine oil on the HERMS coil.  We thought this deep clean would clean that off, however we realized the solution did not take off that stuff, so we went at it with paper towels.

After cleaning everything we spent the rest of the evening bottling up the remaining Not So Banana Ale, or NSBA for short, to free up a keg.  There were probably only 12 bottles worth left.  Once the keg was free, we sanitized our two open kegs and then kegged our Saison.

In tasting the Saison, the first one we tasted did not taste that good.  It had a slight soapy taste to it, and a very bitter bite at the end.  That batch was using a White Labs Saison yeast that we fermented at around 76 degrees.  In later researching we thing we either let it stay in primary too long, keeping it in contact with its sediment.  Or possibly the temp was too high, however that yeast strain should be ok there.  The other tank which used a Belgian White yeast strain tasted better, but a little too sweet maybe.

We shot both kegs up with CO2 to carbonate, however we only put one in the fridge, and left the off taste one at room temp for a while in hopes it would settle down.  The one in the fridge should have enough carbonation by next weekend to drink.

We still have a keg of British Brown Ale that we need to bottle half of for our friends Rose and Joe.

It was a full night testing, cleaning, bottling, and kegging, but we are ready to go!

Batch #1 - Dogfish Head 60 Minute IPA Clone

On Saturday, August 18, 2012 we broke in the new brewery with a Dogfish Head 60 Min IPA clone recipe I found online at the Homebrewtalk.com forum.  Here is the link for those interested:

http://www.homebrewtalk.com/f69/dogfish-head-60-minute-clone-ag-extract-25709/

The recipe looked like this:
  • 28 lbs - 2 Row Pale Malt
  • 12 oz - Carapils
  • 6 oz - Crystal Malt 60L
  • Hops
    • 1.5 oz Warrior
    • 1 oz Amarillo Gold
    • 1 oz Simco
    • 1 oz Simcoe (later for dry hopping)
    • 2 oz Amarillo Gold (later for dry hopping)
  • Yeasts
    • 2 Packets - Pacific Ale Yeast - White Labs 0041
    • 2 Packets - American Ale Yeast - 1056
  • Additives
    • 2 Whirfloc Tablets
    • 2 Grams Calcium Carbonate (Chalk)
    • 3 Grams Calcium Sulfate (Gypsum)
    • 2 Grams NaCl (Kosher Salt)
    • Potassium Metabisulphite
Being the Project Managers that Sam and I are, we worked out a step-by-step process we followed for our first brews to ensure we were not doing anything out of order.  This will probably be the only time I go into a bit of the step-by-step process, going forward will mostly just review what we brewed and results.

The process started by heating the water in the HLT (Hot Liquor Tank).  We filled that up to 20 gallons and then heated it up to 154 degrees.  While the water was heating we crushed our grains in our Barley Crusher grain mill.


Our first lesson came during the crush, which is to always make sure the cordless drill is fully charged!  Ended up having to use the hand crank for a bit of it.

Once the water was up to temperature we transferred hot water from the HLT to the MLT (Mash/Lauter Tun).  For this recipe we used 9.6 gallons.  This is calculated via a straight forward equation:

Strike water = (Mash Thickness X Pounds of Grain / 4) + liquid in hoses 
courtesy from Kal from www.theelectricbrewery.com

We were going for a Mash thickness of 1.25, so the equation looked like:

Strike Water = (1.25 x 29.125/4) + .5 = 9.6

After transferring this water, it needed to be heated a little and brought back up to temperature as it lost a little heat during the transfer process.  This only took maybe 10 minutes.  After it was up to temperature we slowly started scooping the grain into the MLT until it was all in.  During this process we were mixing it the whole time to ensure no dry clumps and a well mixed mash.

At this point we introduced our Brewers Salts (Chalk, Gypsum, Salt), stirred well, then took a Ph reading.  Our target Ph level is 5.2-5.3, we were coming in at 5.7 at this point.  To decrease that level we need to introduce an acid, and most brewers will use Lactic Acid at 88% concentration.  Very little is needed, we only added 4ml to the entire batch to bring down to 5.3.

Once we had all of our levels good, we started our Mash process for the next 90 minutes*

*Lesson 2, the timer needed to be programmed to reflect min:sec, it defaults to seconds.  We entered 9000 thinking it was set for 90 min and 0 second, but it was 9000 seconds.  We ended up with a 2.5 hour mash!  Fortunately I don't think it hurt much, mostly my pride.

The next phase is to Mash Out.  This is done by bringing the HLT up to Sparge temperature, which will bring the MLT up as well through the HERMS system.  Once up to temperature we reconfigure the hoses and then start moving the liquid out from the bottom of the MLT over to the Boil Kettle.  Since we only had 9.6 gallons in the MLT, we then start moving more water out of the HLT over to the MLT to compensate.

This process is called Sparging.  It is taking the new water from the HLT and feeding it onto the top of the grain bed in the MLT to basically rinse out the last of the sugars.  I should also mention before we started moving that water, we did a Ph reading on the HLT and introduced Lactic Acid to bring it down to a level of 5.8.

During this stage we realized the rig was still being dialed in.  We didn't feel the heat exchange was as good as it should be between the MLT and the HLT through the HERMS system.  We took note of this to address between brews later.

This Sparge process lasts about an hour, and what you are left with is sweet wort in the Boil Kettle.  We then bring that up to a boil, and start to add our hops.  As this is an IPA there are a lot of hops involved.  This particular recipe called for a continuous hopping during the entire boil where we start by slowly introducing Warrior hops, then at 25 minutes in we start introducing the Amarillo Gold hops, then for the last 30 minutes we slowly introduce the Simcoe hops.  We do this for the entire 60 minute boil where ideally we are putting in the last hops at the end of the boil.

15 minutes before the end of the boil we introduce the whirflock tablets, however we lost track of time a bit and put it in closer the 8 minutes remaining.  This is used as a clarifying agent to help us achieve a nice clean looking beer.

Once the boil is complete we run out of the Boil Kettle and through our wort chiller to bring the wort down to 72 degrees.  This will allow us to pitch the year right away.  However first we take the full fermentors and introduct oxygen for the yeast.  We have a small tank with an air stone that helps disperse the Oxygen, we run that for about 2.5 minutes.

Lastly we label our fermentors as we used the Wyeast in one of the carboys, and the White Labs yeast in the other.  We then pitch the yeast into the wort, then go and set it all someplace nice and dark and cool.

These yeasts want to be around 65-68 degrees, so I put the fermentors in our utility room which has a concrete floor in it, and is located next to the AC handler which makes the room a little colder.  Last check the room was at 65 degrees (rest of the house not near that cold).

We will ferment this for 2 weeks, then move to a secondary fermentor, at which time we will add our dry hops to the worts.  We will let that site for another week and we will keg that beer.  After about a week in the keg with CO2 plugged in, it will carbonate itself.  It would be good to drink then, but it does get better over a little bit of time to let the beer mature and smooth out a bit.

After we complete some next phases I will take some photos and post them.  Cheers!

Building Relativity Brewery

Here is the birth of our brewery! - by Jeremy

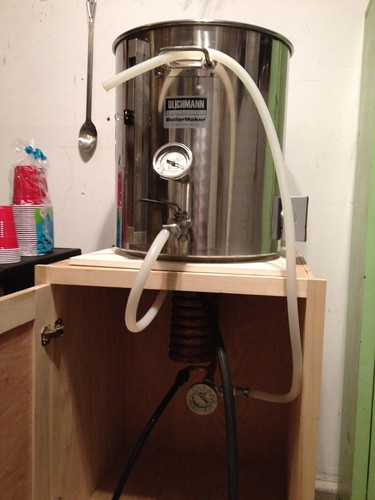
When we started this effort, I knew we had a few things to test out first, the biggest being brewing in the garage. Up to this point I was an extract brewer in my kitchen, so I wasn't sure what challenges we would have in the garage. I first pulled the trigger on purchasing only the boil kettle, and building the boil portion out and doing extract brews.


Here our cat Maggie was checking out the new addition.

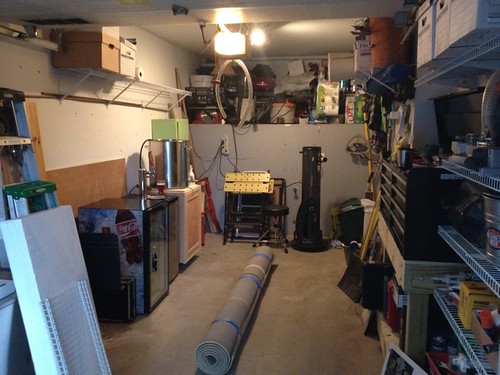
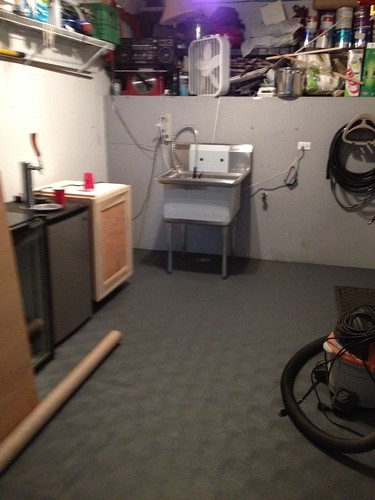
As you can then see below the garage was in need of a lot of work.  I do have the boil kettle in here on top of a cabinet on the left. Things were pretty cluttered, and needed a gamplan to get turned into a place to brew.


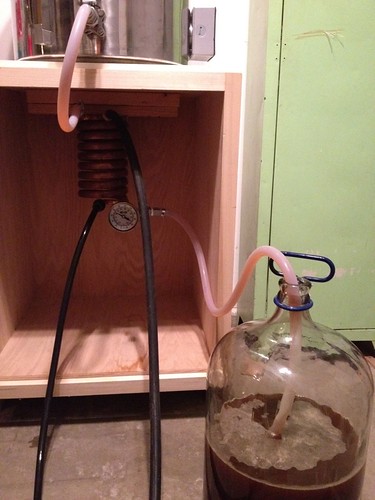
After getting the boil pot built, and running a 30amp 240 volt power supply, we started doing extract brews.  We would simply plug the Boil Kettle directly into the outlet we ran for the brewery. We would lose a lot of brew through evaporation as the heating element was on the entire boil (later a temp controller would control this part), but it worked for our purposes. All-in-all we did about 4 extract brews with just this while I was ordering and building the rest of the rig.


The batches we did were:
  • Banana Ale (later renamed Not-So-Banana Ale for the lack of banana flavor)
  • Firecracker Ale  - Made for the 4th of July, had Red Hots candy put in during the boil for a little zip and red color.
  • British Brown Ale
  • Saison
Those were just a couple of pics from an extract brew day. We learned a lot from doing this. First, a sink was going to be a game changer and we needed one. Second, we spill a little from time to time, so a protective flooring will making cleaning easier. Third, it might not be a bad idea to put up some sort of backsplash to protect the wall from the steam (a vent will help as well, but that is going to come later).

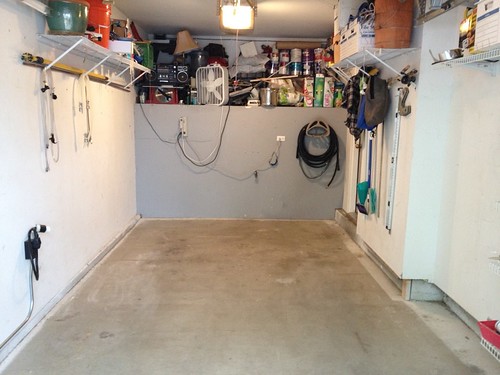
Here I cleared the garage getting ready for the new floor.


Here is an after picture once the new floor was installed, which was just in time as the next day the plumber was scheduled to install the new sink.


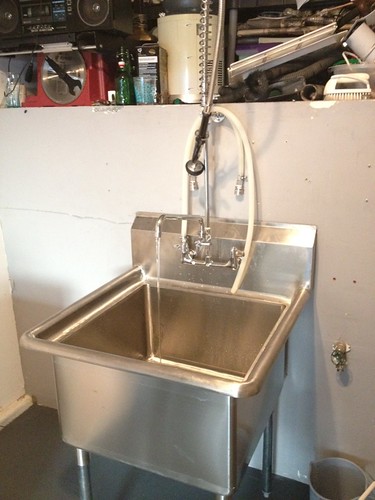
The sink after the plumber finished his work.


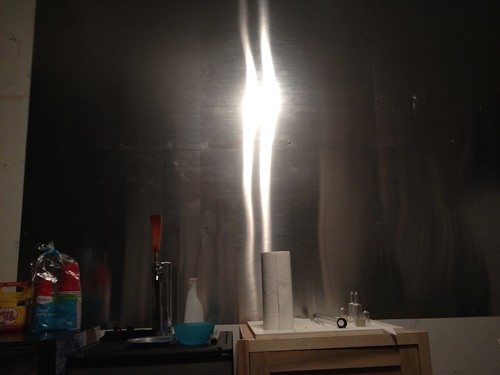
Next for the garage we put up some 3'x3' Aluminum panels we got from Home Depot to make a backsplash.  This would cover everything behind the brew stand.


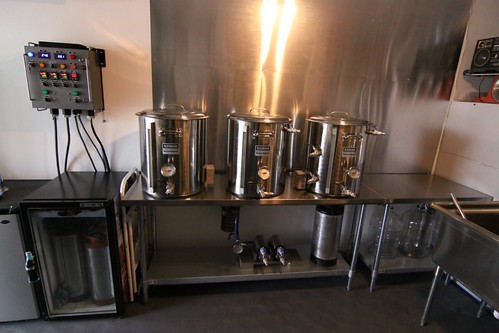
Finally, the new Stainless Steel tables arrived. I threw a couple of pots on for a quick pic to get a feel for the new rig.  At this stage we still had the control panel to complete, pumps to mount, counter-flow wort chiller to mount, lots of work on the kettles directly in adding valves, etc...  However it looks like a brewery here!


The focus then moved to building the control panel.

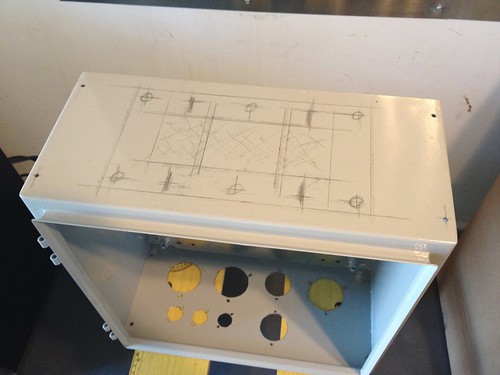
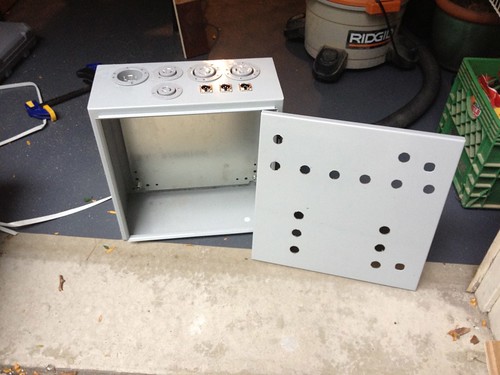
I bought all of the parts from Spike Innovations to put together myself. For a while I thought I would get the holes cut in the control panel via waterjet, but I had trouble getting a reasonable price from a place here in town so I decided to just cut them myself.


After the holes were complete, I did a quick dry fit to see how everything looked in place.


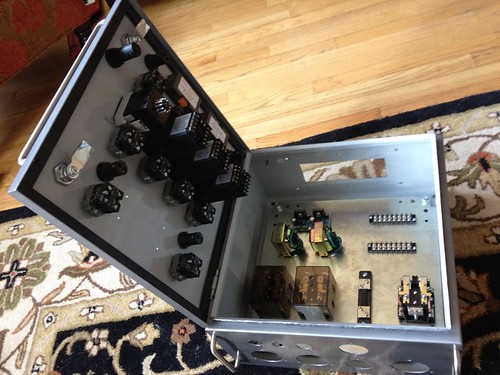
Next step was painting, then starting the wiring.


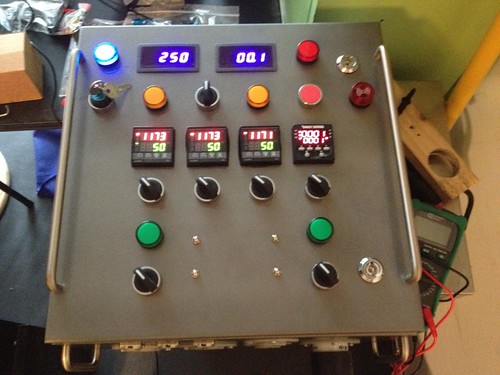
Finally the wiring is complete!


It's alive!


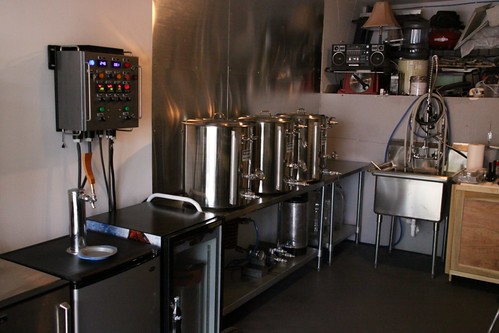
Here is the garage with everything mounted, and system working.  For our first batch we brewed a Dogfish Head 60 Minute IPA clone recipe I found.  More on that to come!


Loving the new system, you'll have to stop by for a beer sometime!